
With regard to practice . .
With regard to practice this week, the question has been: how? While trying to solve the conundrum, I have spent the better part of two weeks exploring blind alleys. Here is the process that I have under-taken:
 |  |
So far so good.
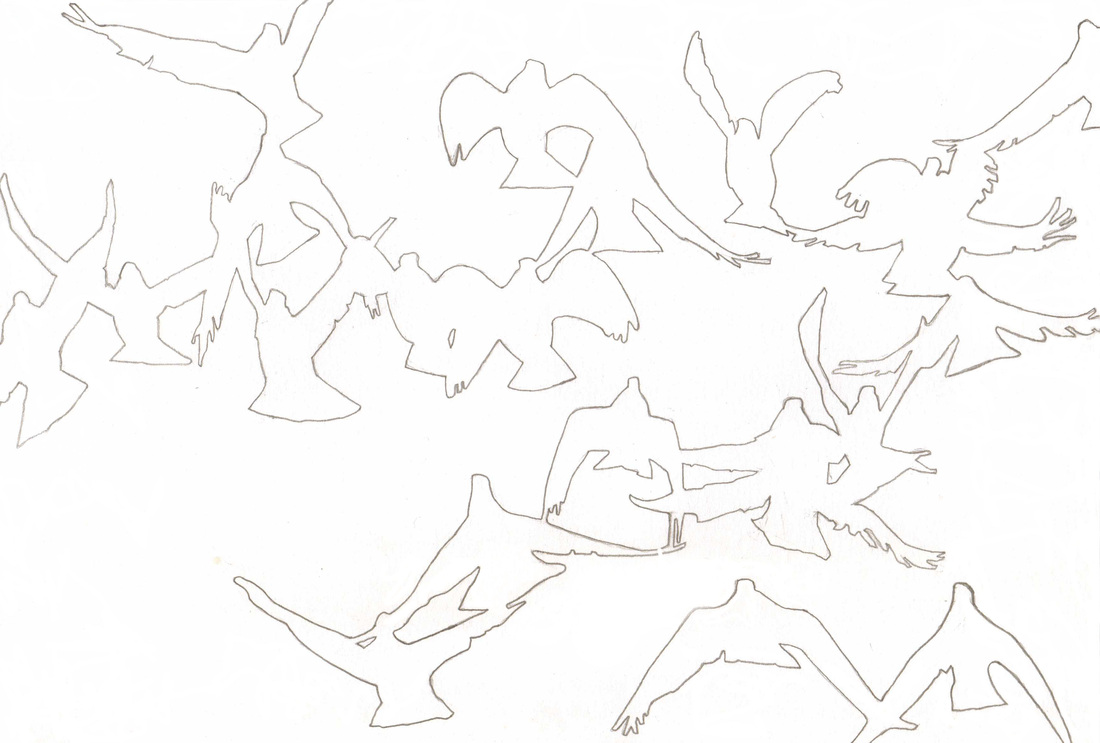
My aim is to suspend the image (increased in size to about 420cm x 297cm) from a ceiling and use light to project the images of cutout flying birds onto the environs, i.e. floor, walls, other areas of the ceiling, etc. First consideration: In order to simulate flying, I thought that cutting the image into squares and suspending each portion, the pieces would naturally *move*, each in its own little orbit.
Second consideration: When working with negative/positive space imagery, the major challenge is securing against the loss of negative space when it is surrounded by positive space. In other words, when I remove the birds, the defining land-locked negative space is removed as well. So it becomes a first-priority necessity to make all the negative space (what is blue) connect together as one shape.
To realise these two considerations, this is what happened next:
 |  |
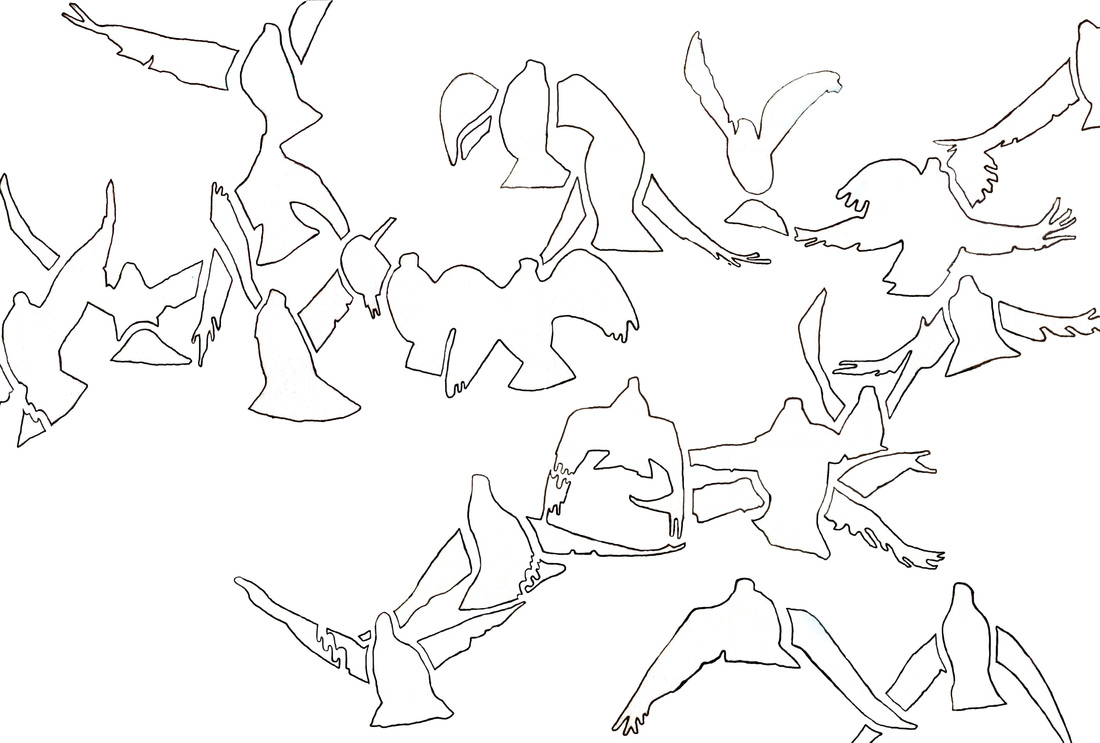
First image: too many squares! Second image: OK, good, might be getting somewhere now. Before embarking onto a fully-sized installation piece, I envisioned making a model to satisfy all the requirements that the scaling-up process might involve. While constructing the model, I would cunningly pre-empt any calamities that might arise during the preparation of the finished version. So, the image was printed onto an A3-sized piece of card. I then separated the image into squares and removed the white areas (the positive space), finally having 30 unique segments (carefully numbered on the back). However, my *cunning* plan promptly backfired due to poorly-chosen materials and a generally ill-informed process. The nightmare started when I began to suspend each piece onto an A3-sized board with transparent reinforcements and transparent thread. Hopeless! I don't mind painstakingly-intricate work on a fiddly, time-consuming project, but when spidery lengths of thread dislodge causing a tangled mess of falling wings and disheveled feathers, *birds flying* spectacularly loses its elegance.
My son said to me: why cut the image into squares? His common sense question perfectly high-lighted the futility of patiently trying to construct a pile of over-complicated nonsense. He theoretically solved the objective of creating *movement* by shifting the responsibility of that aspect of the installation. Instead of separate segments providing movement, that quality could be created by a rotating light fixture. With this change of focus, I removed the grid, but maintained the background as one shape. As I often do, I go backward to go forward. Here is the most recent version of the piece:
My son said to me: why cut the image into squares? His common sense question perfectly high-lighted the futility of patiently trying to construct a pile of over-complicated nonsense. He theoretically solved the objective of creating *movement* by shifting the responsibility of that aspect of the installation. Instead of separate segments providing movement, that quality could be created by a rotating light fixture. With this change of focus, I removed the grid, but maintained the background as one shape. As I often do, I go backward to go forward. Here is the most recent version of the piece:
 |  |
New problem: What material? First, I considered ply. My son suggested opaque perspex and laser-cutting the images into it. As I would like to increase the image to 10x its original size, I think that perspex would work better (and for me, using a jigsaw isn't such an attractive option). In the meantime, one of my colleagues suggested that I take a look at the work of Peter Callesen, a Danish artist who has made some incredibly impressive works simply using A4 sheets of paper.
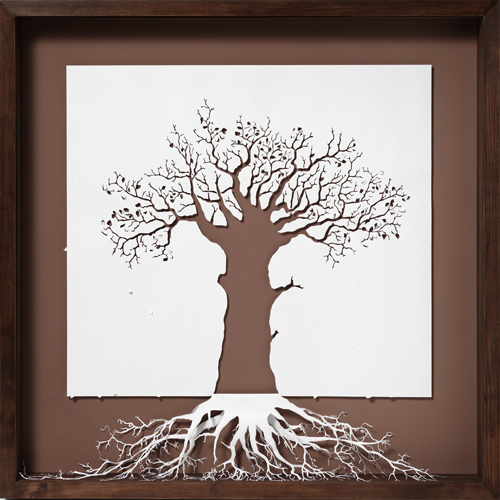 Peter Callesen (2009), 'The Roots of Heaven'. | 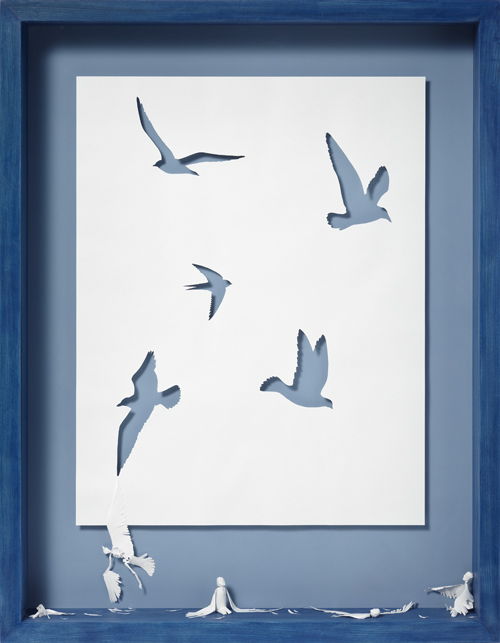 Peter Callesen (2009), 'The Birds of the Air'. |
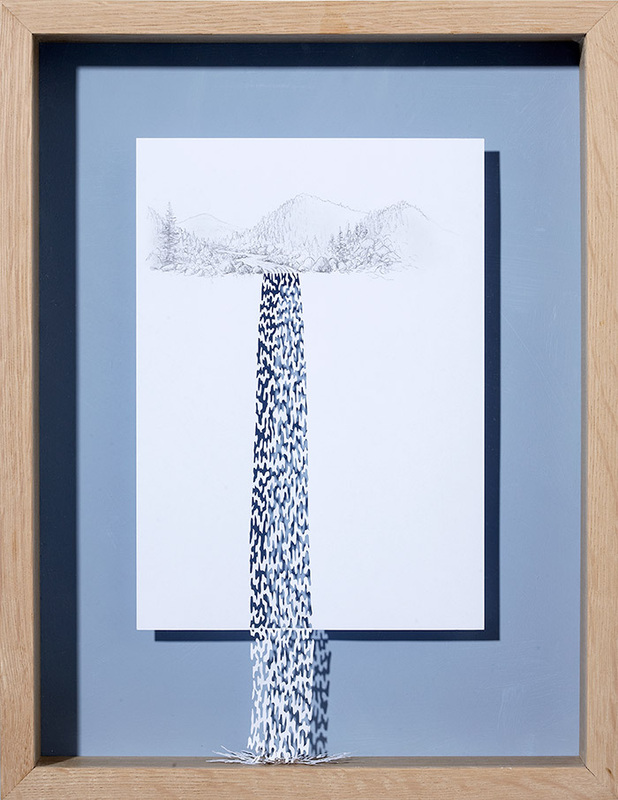 Peter Callesen (2006), 'Water Always Finds its Way'. | 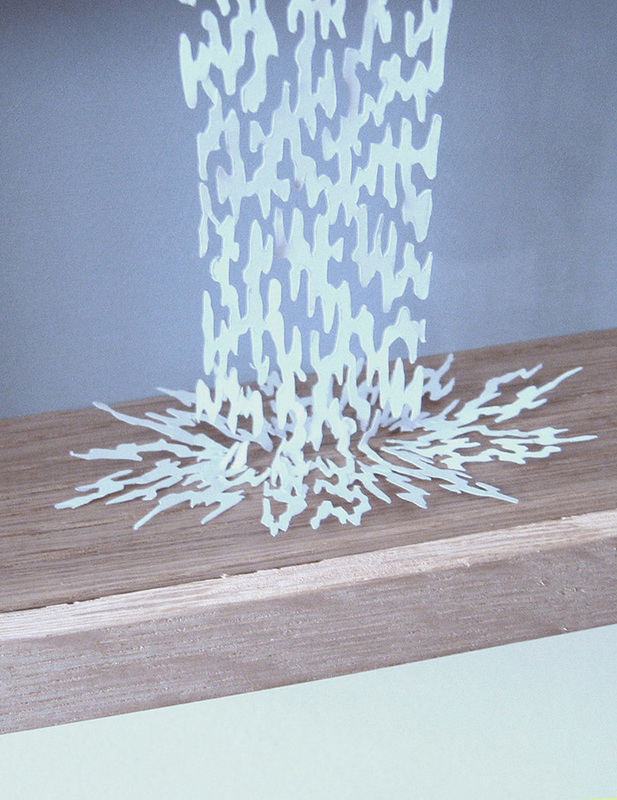 Peter Callesen (2006), 'Water Always Finds its Way' (detail). |
 RSS Feed
